Unit 78: Task 3
Be able to create digital graphics for a computer game following industry practice
Unit 78: Task 3For this task I am going to document the process I went through in order to successfully digitalise my concept art (character and environment) using Adobe Illustrator.
Plan: asset management (file storage and retrieval, naming conventions); workflow (scheduling, efficient time management); deadlines (production milestones, deliverables, quality assurance)
When digitalising my concept art I had to ensure I planned specific parts of my process in order to remain organised and to ensure my concept art was completed in time for it to be submitted. Firstly, I had to work on my asset management. Initially, I was very un-organised and had many files sprawled across my desktop. This meant that it was easy for me to get confused about what each piece of work was; due to me not naming them properly, and I was also at risk of losing some work.

However, I quickly rectified my mistakes. I began by organising all of my files into separate folders on One Drive and made sure to use file naming conventions that allowed me to quickly navigate between pieces of work.

Furthermore, whilst working on digitalising my character I had to ensure I maintained a steady workflow. This meant that I had to dedicate time to both my concept art and other pieces of work so that I could complete it in time. In order to do this effectively, I found it useful to have set deadlines for separate pieces of work. There were different deadlines for my character to be digitalised and my environment to be created which encouraged me to work at a steady pace and make significant progress on both pieces. Any extra time I had before the deadline for both pieces of digitalised artwork, I used to try and improve them.
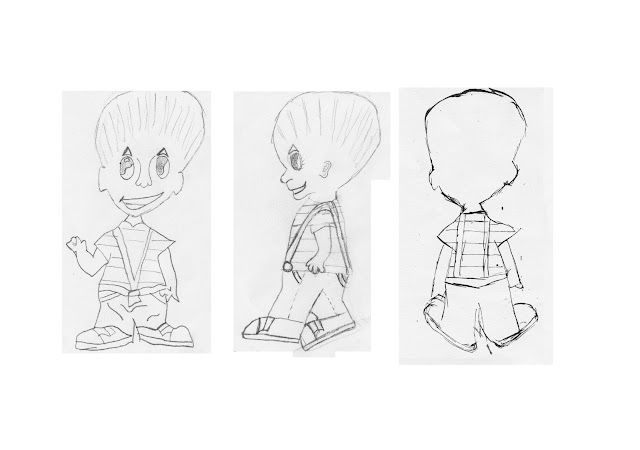
In order to digitalise my character and create the environment, I used Adobe Illustrator. This meant that I had to use a lot of the different features within the software interface. For example, I used the Pen Tool to trace around the sketches of my character after I had placed them into Adobe Illustrator. Originally, within my sketches I had also accidentally cut off the head of my character as I reached the top of the page. Nonetheless, whilst digitalising my character, I was able to easily rectify this mistake through the use of the Pen tool in which I brought the curve of my character's head further upwards in Adobe Illustrator.
After I had finished tracing my character, I used tools such as the fill tool to add colour to my digitalised character and the shape builder tool to create shadows on my character following the contours of their head and other parts of their body to try and make them appear more natural.


The tool Panel available on adobe Illustrator:
Throughout the process of digitalising my character, it was still important that I remained organised and tidy with my work especially as there were many different parts I had to trace to complete my characters. In order to remain organised, I utilised the layers feature within Adobe Illustrator which allowed me to separate all of the different components that I used to create my character. I also made sure to name each layer so I knew what was contained inside of each one. This tool also allowed for each layer to be colour coded which made things easily distinguishable from one another.

I also used several Artboards within Adobe Illustrator which allowed me to view my mood boards in conjunction with my work .This allowed me to easily view it for reference throughout the process of creating my character. This was one of the most useful tools when I had to focus on my organisation and workflow.


A keyboard shortcut is a way that you can quickly access tools and functions within a piece of software; like Adobe Illustrator, through the use of certain keys. This allowed me to increase the speed at which I worked and challenged my memory of the software whilst simultaneously making me more accustomed to the major tools available. I learnt many useful keyboard shortcuts whilst creating using Adobe Illustrator such as:
Cmd + Z Undo
Cmd + G group
Cmd + C copy
Cmd + F paste in front
P pen
Cmd + ] bring forward
Cmd + [ send backward
Cmd + zoom in
Cmd - zoom out
....and many others.

Asset management: export filepath; file format; compression; file naming conventions; file backup
I saved my files when creating my character and environment as adobe illustrator files (.ai). This meant that when I came back to my files I would still have access to all of the layers I had created when using Adobe Illustrator and that the files could easily be reopened within the software itself. Additionally, it meant I could open the files and access them from any computer that had Adobe Illustrator on it without worrying about any changes or loss of content.
Workflow: eg reference images, plug-ins, optimising (bit depth, resolution, dimensions)
In order to maintain a steady workflow, I utilised an Adobe Illustrator feature known as an artboard. The artboards present meant that I was able to have my images for reference such as my mood boards and colour schemes present whilst I worked on digitalising my character. This meant that I could work much faster as I had everything I needed in one space. This also meant that I maintained my focus as all of my work was organised and easily accessible.
Here you can see my separated artboards with my character's outfit mood board and reference images spread along it.

Menus: open; save; new; import; export; edit; view; help
The menus available within Adobe Illustrator were very significant as they acted as a guideline for how to use the software. Within the menus, I was able to access basic features such as to save and to create a new file. The menu, in particular, was very useful as it enabled me to find figure out many of the Keyboard Shortcuts within Adobe illustrator as they were usually on the right-hand side of any particular tool or function I wanted to carry out. This meant that I could broaden my knowledge on the software's many features and tools and also meant that I discovered multiple other tools and could incorporate their functions into my work. For example, whilst looking through the menus I discovered a tool called Gaussian Blur. This specific tool allowed me to blur the rectangular figures within the background of my environment which gave the illusion that they were further away, therefore; much more difficult to see clearly.

This image displays how I found the Gaussian Blur within the Effects Menu:

Image settings: size; resolution, width; height; colour mode; background; transparency; aspect ratio; file name
When scanning in the sketches of my character before I could digitalise them, I had to focus on the size and resolution. My sketches were initially quite small. This meant that in order for me to get a clear image that I could easily trace I had to scan my sketches at a higher resolution. Usually, images are scanned at 300dpi, but for my much smaller sketches, I chose to scan them at 500dpi. This meant that my sketches were much clearer and therefore easier for me to trace when later placed into Adobe Illustrator.
This is what my work looks like at the end of my process digitalising my Character and Environment within Adobe Illustrator:


Comments
Post a Comment